
This Learn AWS Series is based from a post on Reddit by u/SpectralCoding (reddit.com) called So, you want to learn AWS? AKA, “How do I learn to be a Cloud Engineer?” (reddit.com)
This Account Basics Post will follow making an account, setting up multifactor authentication, setting up billing alerts and downloading and configuring the AWS Command Prompt Interface.
Once you are done, we should be have a secure AWS account to ensure our hard work is safe, notifications to ensure we aren’t spending much money running this tutorial and also be able to issue commands via Powershell direct to AWS to allow for managing our budding infrastructure using code.
Step 1. Create a AWS Account. Its super easy. It takes like 5 minutes. You will need a credit card. Head on over to Amazon’s AWS (aws.amazon.com) and hit signup. Fill in your details and credit card information and get that account created.
AWS will not bill your credit card unless you setup something outside their free tier. I will try to note when this is going to happen so you don’t get surprised by it.
Step 2 is setting up multifactor authentication.This is super easy with the Google Authenticator on my mobile phone. If you dont have the app. Get it on your phone using the links below. This app is super useful for securing all sorts of websites including Google and other sites that use MFA.
Android Play Store – Google Authenticator (play.google.com)
Apple App Store – Google Authenticator (itunes.apple.com)
Once you have the Google Authenticator app. Its time to set it up in AWS. Head over to the AWS IAM Page (console.aws.amazon.com) and click on “Manage MFA” under the “Activate MFA on your root account” heading.
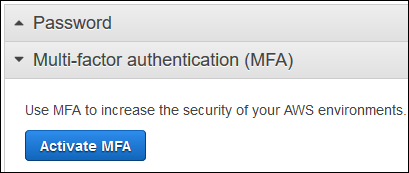
Click on “Activate MFA” under the “Multi-factor authentication (MFA)” heading.

Since we are activating to the Google Authenticator, then select “Virtual MFA device” and click “Continue”.
Use the QR code to activate AWS against your Google Authenticator. Type in the 2 last MFA Codes to prove its working and click “Assign MFA”. And we are done.
Step 3. Time to set up billing alerts. We really do not want to receive any unexpected surprises here, so I highly recommend setting up these alerts to keep your expenditure down.
Head over the the AWS Billing and Cost Management Page (console.aws.amazon.com). Click on “Billing Preferences” on the left hand side and then tick both “Receive Free Tier Usage Alerts” and “Receive Billing Alerts”. Make sure to click on “Save Preferences” when done.
Now to setup the billing alert itself. For this we need to goto the CloudWatch Management Console (console.aws.amazon.com). You may need to select the correct region for you. I am in Australia and will therefore choose Asia Pacific (Sydney) but you should choose whatever region is closest to you. Remember this region as you will need to make all further decisions from this AWS region.
Click on “Billing” on the left hand side then click on “Create Alarm” in the middle pane.

Leave mostly everything at the default settings except for the stuff in the picture shown. Change the USD threshold to 1 USD. And create a notification list to send emails to. Click “Create Alarm” when done.
It will display as insufficient_data to start with, but will come good after awhile.
Step 4. Setting up AWS CLI. This one is also fairly easy. Head over to AWS Command Line Interface page (aws.amazon.com). I recommend booking this page as it has the AWS CLI reference guide which you will find yourself looking for a lot later on in this series.
Download the AWS CLI using the links on the right. Choose the 64-bit client if you are on Windows and unsure of which to choose. Install the program when done.
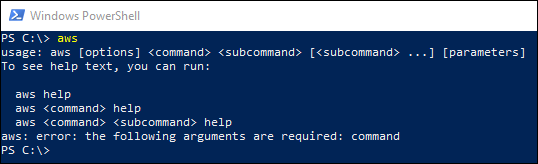
And thats about it. To check if its working, open Powershell and type in “aws” and hit enter. Because we executed the AWS command without any options, it will display a brief help message.
And that’s it. We are done with Account Basics. You now have an AWS Account. The account is secure with 2 Factor Authentication. You’ve got billing alerts to ensure you don’t accidentally spend much money and you’ve got AWS CLI up and running for when we really get into the automation and scripting parts.
Stay tuned for Part 2. Web Hosting Basics. We finally create something.